Cardinal Mobile SDK iOS Integration Documentation V 2.1.4
- Brennan Keller (Unlicensed)
Overview
.png?version=1&modificationDate=1562166310844&cacheVersion=1&api=v2&width=750&height=729)
Activation Steps
Cardinal wants to get you up and running with CCA as quickly and seamlessly as possible. This section of the document will outline the simple steps that are necessary in order to take advantage of Cardinal Mobile SDK..
Step 1 - Download and Import the Cardinal Mobile SDK
Download the CardinalMobile.framework file using following cURL.
curl -L -u<USER_NAME>
        :<API_KEY> https://cardinalcommerce.bintray.com/ios/<VERSION>-<BUILD_NUMBER>/cardinalmobilesdk.zip
        -o <LOCAL_FILE_NAME.EXT>

#Example:
curl -L -uUserName:ApiKey "https://cardinalcommerce.bintray.com/ios/2.1.4-2/cardinalmobilesdk.zip" -o cardinalmobile2.1.4-2.zip
In your XCode project, drag CardinalMobile.framework file into the Frameworks group in your Xcode Project (create the group if it doesn't already exist). In the import dialog, tick the box to Copy items into destinations group folder (or Destination: Copy items if needed). The iOS SDK files are now available for linking in your project.
For Bintray username and API Key please reach out to your client manager.
Step 2 - Setting Up Your Build Environment
- Open Xcode and click on your project in the source list to the left of the main editor area.
- Select your application under the Targets section and go to the General tab.
- Expand the Embedded Binaries section then click the small “+” button at the bottom of the list.
- Add the CardinalMobile.framework from the list
Step 3 - Configure Cardinal Mobile SDK
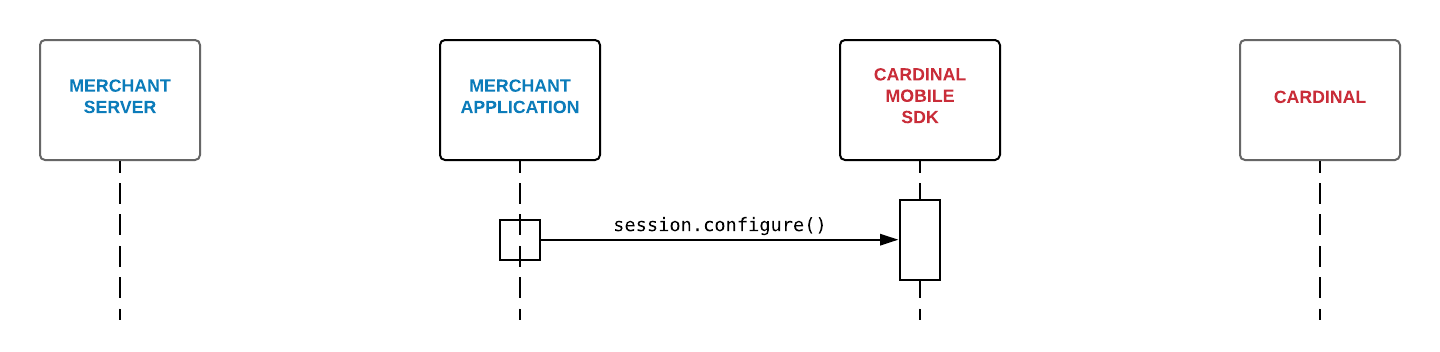
Upon successfully completing Integration in Step 1 and Step 2, create a new instance of the cardinal object by [CardinalSession new]. SDK offers multiple configuration options for you (if not specified, everything is set to default). For more details: CardinalConfigurationOptions. Use the code snippet below for completing the configuration.
Step 4 - Setup the Initial Call to Cardinal
.png?version=1&modificationDate=1561735868811&cacheVersion=1&api=v2&width=803&height=400)
Calling cardinal session setup will begin the communication process with Cardinal to ensure your user's experience is seamless, by authenticating your credentials (serverJwt) and completing the data collection process. By the time they are ready to checkout, all necessary pre-processing will be completed.Use the code snippet below for completing the cardinal session setup.
NOTE: The following function call must be placed in your Checkout ViewController.
cardinal session setup.It is ideal in a flow where the consumer has already entered their payment information.Step 5 - Create a Lookup Request/Response to Centinel
.png?version=1&modificationDate=1562166311019&cacheVersion=1&api=v2&width=930&height=399)
Create an API call to your backend server in order to send a Lookup Request (cmpi_lookup) to Cardinal's Centinel platform for initiating the Consumer Authentication transaction. The Centinel platform manages all of the routing and connectivity, as well as the rules engine for all of the various 3-D Secure protocols and versions. Please follow the Getting Started and Lookup Request/Response sections for completing your backend integration: Link
Required Field for identifying as an SDK transaction :
- <DeviceChannel>SDK</DeviceChannel>
- <DFReferenceId>ReferenceId</DFReferenceId>
ReferenceId is consumerSessionId returned on setup completion, if no referenceID is passed in serverJwt. Else you can use that referenceID as DFReferenceId
Step 6 - Handle the Centinel Lookup Response and create the Authentication Session
.png?version=1&modificationDate=1562166416888&cacheVersion=1&api=v2&width=750&height=423)
After the completion of the cmpi_lookup request, check the CMPI_Lookup_Response for the following fields :
- ThreeDSVersion = 2.X ( 2.0, 2.1, etc)
- Enrolled = Y
- PAResStatus = C
Upon validating the above fields, you will call [session continueWithTransactionId.. ] to hand control to SDK for performing the challenge between the user and the issuing bank. Use the code snippet below for completing the session's continue.
cardinal session continue is updated without the hardcoded directoryServerID.
[session continueWithTransactionId: @"[TRANSACTION_ID]" payload: @"[PAYLOAD]" directoryServerID: CCADirectoryServerIDVisa didValidateDelegate: self];
In continue for Quick Integration, a class conforming to a protocol CardinalValidationDelegate (and implement a method stepUpDidValidate) should be passed as a parameter. Following is the example of class conforming to CardinalValidationDelegate protocol.
Step 7 - JWT Validation
Once the response JWT arrives in the onValidated, you will need to send the response JWT to your backend for verification and consumption. We recommend that any values sent to 3rd parties are sourced from the response JWT after it has been properly validated.
Security Warning
For security reasons, all JWT validation must be done on the server side.
Looking for more information?
| Claim | Description |
|---|---|
| aud | Merchant jti Id - This is the 'jti' field from your request JWT echoed back. This field allows you to match up your request JWT with Cardinals response JWT. |
| jti | JWT Id - A unique identifier for this response JWT. This value is generated by Cardinal. |
| iat | Issued At Time - This is a timestamp of when the JWT was created. |
| iss | Issuer - The request JWT's iss field echoed back. |
| ConsumerSessionId | The unique session Id for the current user. |
| Payload | The response object for your request. This field will contain any actual state information on the transaction. This is the decoded data object that is passed into the payments.validated event as the first argument. |
JWT Payload Example
Below is an example of the JSON content of a basic response JWT Payload where we are passing an object within the Payload claim:
{
    "iss": "56560a358b946e0c8452365ds",
    "iat": 1471014492,
    "exp": 1471021692,
    "jti": "8af34811-f97d-495a-ad19-ec2f68004f28",
    "ConsumerSessionId": "0e1ae450-df2b-4872-94f7-f129a2ddab18",
    "Payload": {
        "Validated": true,
        "Payment": {
            "Type": "CCA",
            "ExtendedData": {
                "CAVV": "AAABAWFlmQAAAABjRWWZEEFgFz+=",
                "ECIFlag": "05",
                "PAResStatus": "Y",
                "SignatureVerification": "Y",
                "XID": "MHEyQjFRQkttemdpaFlRdHowWTA=",
                "Enrolled": "Y"
            }
        },
        "ActionCode": "SUCCESS",
        "ErrorNumber": 0,
        "ErrorDescription": "Success"
    }
}
Below is an example of the JSON content of a basic response JWT Payload where we are passing a string within the Payload claim. This would occur when the request JWT included a ObjectifyPayload flag set to false:
}
    "iss": "56560a358b946e0c8452365ds",
    "iat": 1471015342,
    "exp": 1471022542,
    "jti": "55ebfa2a-665f-4d6b-81ea-37d1d4d12d9e",
    "ConsumerSessionId": "fb3a97a3-0344-4d3d-93ea-6482d866ec97",
    "Payload": "{\"Validated\":true,\"Payment\":{\"Type\":\"CCA\",\"ExtendedData\":{\"CAVV\":\"AAABAWFlmQAAAABjRWWZEEFgFz+\\u003d\",\"ECIFlag\":\"05\",\"PAResStatus\":\"Y\",\"SignatureVerification\":\"Y\",\"XID\":\"MFpjUVpwb0FXcHdwMWJBdldwNDA\\u003d\",\"Enrolled\":\"Y\"}},\"ActionCode\":\"SUCCESS\",\"ErrorNumber\":0,\"ErrorDescription\":\"Success\"}"
}
![]()